 If you’re suffering from chronic pain in your lower back (or other areas) and want an alternative to expensive medications, yoga might be for you.
Research has indicated that yoga poses can effectively treat chronic pain resulting from osteoarthritis, fibromyalgia, and carpal tunnel syndrome.
When performed correctly, yoga movements can help significantly reduce muscle stiffness and joint pain, while improve flexibility, range of motion and muscle strength.
All of this is important for those of you who are aging, with or without pain. Flexibility, balance and strength gains that come from yoga can also help you stay strong, agile and on your feet. This can limit the potential for falls and serious injury.
Best Yoga Poses for Pain Relief
Some of the best yoga poses for pain relief are:
1.Cobra (For Back Pain)
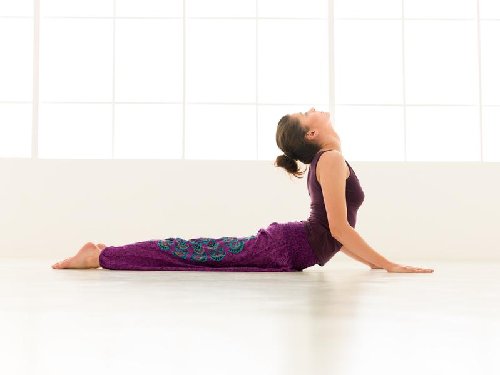
Lie face down with your forehead to the floor and your hands (palms down) directly under your shoulders. Bring your legs together and press the tops of your feet into the floor. Lengthen your legs and press evenly through your hands, while bringing your elbows towards your rib cage. Use your back and chest (not arms) to lift your head and chest off the ground. Hold and then take five or 10 deep breaths before releasing.
2.Supported Warrior (For Knee Pain)
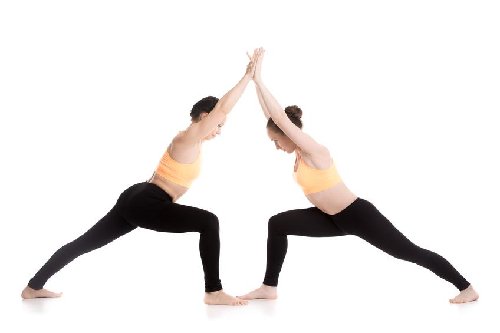
You can do this solo or with a partner. If solo, stand up tall and place your hands on a wall at shoulder height. Step forward with your right foot so your toes are against the wall and bend your elbows like you’re trying to push the wall away. Bring your left foot one to three feet behind you, slightly bending it towards the floor. Hold this pose for 10-15 breaths and then slowly straighten the left leg while bending the right knee. Make sure the knee does not extend beyond the ankle. Hold for 10-15 breaths and then slowly return to the starting position before switching legs.
3.Butterfly (For Hip Pain)
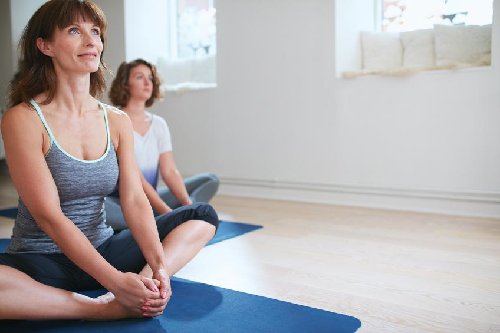
Sit on a blanket or yoga mat, with the soles of your feet pushed together. They should be close to your body. Put your legs in a diamond position with knees pointed outwards. Your entire back should be straight and tall, but your shoulders should be relaxed as you breathe; let the weight of your legs move towards the floor.
These are just three movements you can try to help relieve pain in common areas, but they certainly aren’t all you can do. A full yoga-routine that targets the whole body is the best way to experience the interconnectivity and maximum benefits of yoga.
Although yoga can easily be performed at home, it’s best to take a yoga class if you’ve never done it before. Make sure to take lessons from a professional so you can perform proper movements that encourage safety and prevent injury. You also get the added benefit of social time! And don’t worry; most communities have senior-specific yoga classes.
Source for Today’s Article:
“5 Pain-Relieving Yoga Poses,” Prevention, November 16, 2011; http://www.prevention.com/fitness/yoga/yoga-poses-relieve-aches-and-pains, last accessed August 24, 2016.